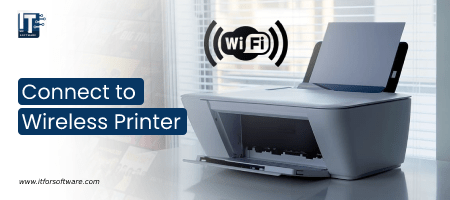
Don’t you just despise the times when you need to print something quickly but your printer is stored somewhere, or do you still need to connect an annoying USB cable? When you select a wireless printer, you can remotely print, fax, and scan to Windows 10 without being physically connected to the device. Let’s take a look at how to connect your wireless printer in Windows 10. See our helpful guide on how to set up a wireless printer.
How to connect your printer wirelessly?
In this guide, I’m using my reliable HP 4500, but any wireless printer or all-in-one printer should work fine – for example, my version includes a newer model.
This manual covers direct connections. So if you want to learn more about the homegroup in Windows 10, be sure to read our detailed guide, where you can set up and configure the sharing of printers and content.
- Open the Windows search by pressing the Windows key + Q.
- Enter the “Printer”.
- Choose Printers and Scanners.
- Turn on the printer.
- Refer to the manual to connect it to your Wi-Fi network. Unfortunately, this process not only differs from manufacturer to manufacturer but often also from printer to printer.
- Click Add Printer or Scanner.
- Select the printer from the results.
- Click Add Device.
You should be good to walk now. This process also works with wired printers. Simply connect the device and follow the steps above.
How to connect brother wireless printer?
Brother is a popular manufacturer of printers for home and business use. Many models are Wi-Fi enabled or wireless. This means that you can print documents from a computer across the room or even somewhere else in the building. However, to set up your Brother wireless printer for use, you must first connect it to your local network and install the drivers on all computers that will access it.
- Read the documentation for your router on how to access its web interface. Open the user interface in the browser of your computer and write down the SSID number, the authentication method, the encryption mode and the encryption key of the router.
- Connect your Brother wireless printer to your router using an Ethernet cable. This is only necessary during printer setup: you don’t have to physically connect the two devices if everything works.
- Insert the Brother Driver software installation CD into your computer’s drive and run the setup program.
- Now you need to pick up “Wireless Setup and Driver Install” and then select “Step By Step Install”.
- Activate the “With cable” option button and click the “Next” button twice. Select the option starting with “BRN” from the list of available network devices. This is your Brother wireless printer.
- On the next screen, select the wireless network with your router’s SSID. If it does not appear in the list, click the “Add” button and enter the SSID number manually. On the following screens, enter the authentication method, encryption mode, and encryption key.
- Disconnect the cable when prompted and agree to the license agreement. Activate the radio button “Search for devices on the network and select from a list of recognized devices” and select your printer from the displayed list to complete the installation.
- Use the CD to install the necessary drivers on all other computers that will use the printer. Instead of performing a WLAN set up on the following computers, select “Driver installation only” in the setup program.
Guide to connect to hp wireless printer
Connect your wireless printer
- Unpack your printer.
- Follow the installation instructions to remove the packaging.
- Plugin the power cord, turn on the printer and install the print cartridges. Let the printer go through its startup routine, including printing an alignment page (if applicable).
- If your printer supports this and you choose an Ethernet connection (wired), connect it now and continue installing the printer software. Note: The printer’s wireless system is disabled when using an Ethernet connection.
How to connect to canon wireless printer?
Are you trying to connect your Canon printer to your Wi-Fi network? Or have you searched for hours quickly and easily on the Internet? Look no further, this is just the guide for you, give it a try!
1. Connect my Canon printer to a wireless network
Connecting your Canon printer to your Wi-Fi network should be as easy as possible by following these steps:
- Press the power button to turn on the printer.
- Press the Settings button. Then press the arrow button and press OK once you go to devise settings.
- Press the arrow button until LAN Settings appears and press OK.
- Press the arrow button until you get to the WLAN setup and press OK.
- If the search takes too long, you can press Stop and the standard setup for WLAN is called up. Press OK.
- Press the arrow button until you find your WiFi network, and then press OK.
- Enter your password for the WLAN (enter password) and press OK.
Press OK once again once the screen says Connected.
2. Add my Canon wireless printer to the computer
After connecting our Canon printer to wifi, you may need to add it to your computer for it to work. Here’s how:
- Press the Windows logo key and R on your keyboard at the same time. Then copy the control and enter the name Microsoft. Devices and Printers in the field and click OK.
- Click Add Printer and follow the on-screen instructions to complete the process.
You have now completed connecting your printer to your Wi-Fi network. Try printing a test page and it should work.
What to do if my wireless printer is not working properly
If your Canon printer looks a little weird, say:
- Error notifications pop up randomly
- It won’t even print at all, etc.
You may have the printer driver out of date or damaged. Therefore, update your printer driver to see if the problem is resolved. If you don’t have the time, patience or skills to manually update the driver, you can do it automatically with Driver Easy.
Driver Easy automatically recognizes your system and finds the right drivers for it. You don’t have to know exactly what system your computer is running on, you don’t have to risk downloading and installing the wrong driver, and you don’t have to worry about making a mistake during the installation. Driver Easy does everything.
You can automatically update your drivers with the FREE or Pro version of Driver Easy. With the Pro version, however, it’s only two steps (and you get full support and a 30-day money-back guarantee):
- Download and install Driver Easy.
- Run the Driver Easy and click the button, ‘Scan Now’. Driver Easy will then scan your computer and detect any problem drivers.
- Click “Update All” to automatically download and install the correct version of ALL missing or outdated drivers on your system (this requires the Pro version – you will be prompted to upgrade if you click “Update All” click).
- Restart your computer so the changes can take effect.
- Check if printing is in progress.
- If your printer still does not work after using Driver Easy, please email us about the problem. Please add the URL of this article so our tech team can help you better.
We hope you have connected your Canon printer to the Wi-Fi network by now, successfully. If you have any questions, ideas or suggestions, please let us know in the comments. You can also check our guide on How to connect a printer to a laptop Thank you for reading!


Hi Dear, I'm Meenu, and I've written the posts on this blog. I've tried my best to pack them with helpful info to tackle any questions you might have. I hope you find what you're looking for here. Thanks for sticking around till the end!