
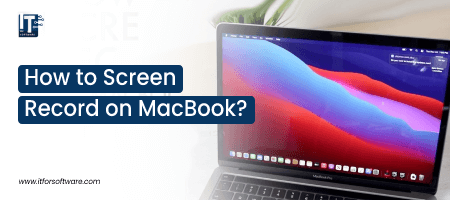
Screen recording has become an essential tool for creating video content, tutorials, and presentations. If you’re a MacBook user, you’re in luck because it’s incredibly easy to screen record on your device with audio. Whether you’re using a MacBook Air, MacBook Pro, or any computer from Apple, screen recording is a powerful tool that can help you create engaging content, tutorials, and presentations. In this article, we’ll show you how to screen record on your MacBook with different methods, how to stop screen recording on mac and additional tips to better your overall screen recording experience on MacBook.
How to screen record on Macbook?
Are you looking to create video content, tutorials, or presentations on your MacBook? Screen recording is a powerful tool that can help you achieve your goals. Whether you want to Record your screen for work or play, this is a comprehensive guide to screen recording on a Mac. Capture your screen with ease and record your voice. Find out ‘how to screen record on your MacBook‘ using different methods and tools.
Built-in Screen Recording on MacBook
The easiest and most straightforward way to screen record on your Mac pro is by using the built-in screen recording feature. Here’s how to do it:
Step 1: Open QuickTime Player
QuickTime Player is a built-in app on your MacBook that you can use to record your screen. To open QuickTime Player, go to your Applications folder and double-click on the app.
Step 2: Start a New Screen Recording
Once QuickTime Player is open, click on “File” in the menu bar and select “New Screen Recording.” A small recording window will appear on your screen.
Step 3: Customize Your Recording Settings
Before you start recording, you can customize your recording settings by clicking on the small arrow next to the record button. You can choose to record your entire screen or select a specific portion of your screen to record. You can also choose to record audio from your microphone or your computer’s audio.
Step 4: Start Recording
Once you’ve customized your recording settings, click on the record button to start recording your screen. You can stop recording by clicking on the stop button in the menu bar.
You can choose to record your entire screen or select a specific portion of your screen to record. You can also choose to record audio or video from your microphone or your computer’s audio. Once you’ve decided what exactly you want, select your recording settings, and start recording your screen. You can stop recording by clicking on the stop button in the menu bar.
How to stop screen recording on mac
As much as screen recording is a useful feature on a MacBook, it is also important to know how to stop screen recording on your MacBook once you’re done.
There are two ways to stop screen recording on a MacBook:-
i) The first way is to click on the stop button in the menu bar. The stop button is located in the menu bar at the top of your screen when you’re recording.
ii) The second way is to use the keyboard shortcut “Command + Control + Esc.” This will bring up the Force Quit Applications window. Select “QuickTime Player” from the list of applications and click on “Force Quit” to stop the screen recording. By knowing how to stop screen recording on your MacBook, you can ensure that your recordings are saved properly and avoid any unnecessary use of resources.
Third-Party Screen Recording Tools
While the built-in screen recording feature on MacBook is great, it has some limitations. For example, you can’t record your face and screen at the same time. That’s where third-party screen recording tools come in. Here are some of the best third-party screen recording tools for MacBook:
i) OBS Studio
OBS Studio is a free and open-source screen recording and live streaming software that’s available for Mac, Windows, and Linux. It’s a powerful tool that allows you to record your screen, your face, and your audio all at the same time.
You can download OBS Studio for free from the official website. Once you’ve downloaded the app, install it on your MacBook and follow the instructions and “Start Recording”.
ii) ScreenFlow
ScreenFlow is a professional screen recording and video editing software that’s available for Mac. It’s a powerful tool that allows you to record your screen, your face, and your audio all at the same time.
In a very similar manner you can Download and Install ScreenFlow. Once you’ve customized your recording settings, select the record screen option.
Tips for Better Screen Recording on MacBook
Now that you know how to screen record on your MacBook, here are some tips to help you create better screen recordings:
i) Use a high-quality microphone: If you’re recording audio, make sure to use a high-quality microphone to ensure that your audio is clear and crisp.
ii) Use a stable screen recording tool: Make sure to use a stable screen recording tool to avoid any glitches or crashes during your recording.
iii) Plan your recording: Before you start recording, plan out what you want to say and do during your recording to avoid any mistakes or pauses.
iv) Edit your recording: After you’ve finished recording, edit your recording to remove any mistakes or unnecessary parts.
In conclusion
Screen recording is a powerful tool that can help you create video content, tutorials, and presentations on your MacBook. Whether you’re using the built-in screen recording feature or a third-party tool like OBS Studio or Screen Flow, you can easily create high-quality screen recordings with audio and facecam. By following the steps we’ve provided, you can take your screen recording game to the next level and create engaging and informative content. So, what are you waiting for? Discover how to screen record on MacBook today and unleash your creativity!


Hi Dear, I'm Meenu, and I've written the posts on this blog. I've tried my best to pack them with helpful info to tackle any questions you might have. I hope you find what you're looking for here. Thanks for sticking around till the end!