In today’s world, contactless payments, also called tap and pay, are finally catching on in the US. Say goodbye to that old swipe or insert the chip end of a card into a reader to use your credit or debit card. In the age of credit card skimmers, this is long overdue.
When you use Apple Pay, purchases are completely wireless, fast, and more secure than if you used a physical credit or debit card. All you need is your iPhone and leave your wallet.
This post includes everything you need to know about using Apple Pay, including how to set it up, how to use it, where you can use it, and much more.
Here are the steps to set up Apple Pay On the iPhone or iPad:
Go to Fire up Settings > Wallet & Apple Pay > Add Credit or Debit Card. If your iTunes & App Store account already has a relevant card on file, iOS will automatically suggest adding it to Apple Pay, if not you will need to either take a picture of your card or enter it manually.
Depending on your bank, you will need to verify via phone, SMS, or e-mail. Most large banks will send you an SMS verification code, while others may require you to call the bank to verify your identity. This process can be instant, or sometimes take several days to complete depending on your bank.
Once verification is complete, you are all set up! Now you will be able to tap your iPhone at any store, restaurant, or gas station that accepts contactless payments, use it in apps, on the web, or send/receive money from friends or family through iMessage.
How to set up Apple Pay on Watch:
The Apple Watch is quite similar to an iPhone or iPad. Go Watch app on your iPhone > Wallet & Apple Pay > Add Credit or Debit Card. If you’ve already set up your
cards on your iPhone. This will be fairly painless as it usually grabs all the information from your iPhone over. Typically only requiring your CVV code to be entered.
But, if this is your first time adding cards on your iPhone or Apple Watch, you’ll require either taking a snapshot of your card with your iPhone’s camera or typing it manually.
Depending on your bank, you’ll need to verify via phone, SMS, or e-mail. Most large banks will send you an SMS verification code, while others may require you to call the bank to verify your identity. This process can be instant or sometimes take many days to complete depending on your bank.
Once verification is complete, you are all set up! Now you will be able to tap your Apple Pay at any store, restaurant, or gas station that accepts contactless payments, use it in apps, on the web, or send/receive money from friends or family through iMessage. Note that you ought not to be paired with your iPhone, nor do you need an internet connection for Apple Pay to work on your Apple Watch.
To initiate Apple Pay, you will need to double-tap the side button (the one that isn’t the crown). If you have multiple cards, you can just swipe through the cards left or right.
On MacBook Pro with Touch Bar:
If you own a 2016 or later MacBook Pro with Touch Bar (so this excludes the MacBook Pro with function row/two Thunderbolt 3 ports), you’ll be able to set up Apple Pay here, as well. You will want to tap the Apple logo on the top left > System Preferences > Wallet & Apple Pay > and then tap the “+” button.
You have the choice between clicking a photo with your FaceTime camera or adding the details manually.
Depending on your bank, you will need to verify via phone, SMS, or e-mail. Most large banks will send you an SMS verification code, while others may require you to call the bank to verify your identity. This process can be instant, or sometimes take many days to complete depending on your bank.
Once verification is complete, you’re all set up! Now you will be able to make purchases through Safari with Apple Pay by using the Touch ID sensor located on the top right of your keyboard.
How to set up Apple Pay to work?
Apple Pay needs a participating card issuer to work. Before trying to register cards with Apple Pay, before attempting you must first verify the issuer of your debit or credit card supports Apple Pay. This need is in place because, whenever a new card is registered. The Wallet app should reach out to the card issuer through the network and request a digital payment card number that’s particular to your device.
This device-specific number and payment token are stored on your apple device securely and protected with multiple layers of security. Whenever you use your device to make a payment, you should authenticate it with your fingerprint using Touch ID. To do so, follow these steps.
- Hold your finger on the bit Touch ID sensor with your iPhone locked.
- Hold your iPhone together with your finger still on the Touch ID sensor up to the NFC reader at the distributor wherever you would like to make a payment.
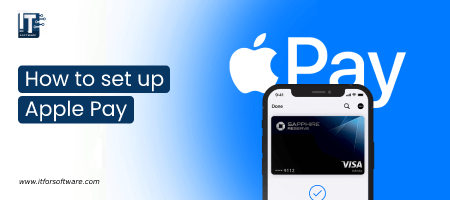
- Your iPhone can illuminate and show the default card registered in the Wallet app (Figure A), and since your finger is on the Touch ID sensor, it will automatically send the payment information to the POS terminal.
Note: For devices with Face ID, you’ll double-tap the Side/Siri button to bring up the Apple Pay cards, then verify with your face and bring the device near to the NFC terminal to pay with Apple Pay.
How to set up Apple Pay secure payment?
Whenever a brand new card is registered for payment, the registered digital payment card number is kept securely in a new chip on the compatible iPhone, iPad, and Apple Watch all models. This chip, referred to as the Secure Element, is designed to stay the numbers stored securely behind your fingerprint data and encrypted to stop hackers from gaining physical access.
Moreover, Apple offers a new tool in the Find My iPhone section of iCloud that allows you to easily unregister your Apple Pay cards remotely and disable the feature on the device.
So, I hope this helps you! And that’s all there is to it!






Hi Dear, I'm Meenu, and I've written the posts on this blog. I've tried my best to pack them with helpful info to tackle any questions you might have. I hope you find what you're looking for here. Thanks for sticking around till the end!